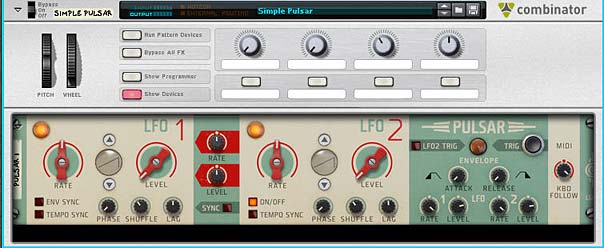
 Here’s a few patches I put together for Reason Essentials users who have the Pulsar Rack Extension. It was pointed out that there were very few synths and effects bundled with Pulsar that are usable in a Reason Essentials environment (I think there were about 5 out of 90 synths and 11 out of 52 effects). All other synths and effects can only be used within the full Reason program. Being one of the team members that helped come up with those sounds, I feel a huge sense of pride at all the sounds we produced. I also wanted to apologize for not including more patches for our Reason Essentials brethren (and sistren?). I hope this makes up for it.
The Pulsar+Essentials Patch Pack contains 14 synths and 6 effects. Since Pulsar cannot save nor load patches, all the patches are Combinators, and all of them use Pulsar, so you need to download the Pulsar Rack Extension in order to use these patches. While they were built for Reason Essentials 1.5 users in mind, there’s nothing stopping those who have the full version of Reason 6.5 from taking advantage of them. Try them out and if you like them, please consider donating: [paypal-donation]
There are two sections:
- Instruments — Use Pulsar’s LFOs as Oscillators to generate the instrument sounds or else use the Subtractor and/or other Essentials instruments to generate the sound. In this second scenario, at least a few Pulsars are used to modulate various parameters of the instruments.
- Effects — Use Pulsar on its own or with other effect devices in order to process your instruments in some way.
Here is a brief description of each patch you’ll find inside this pack:
Instruments
-
4-way ID8 Synth with Multi-FX
This instrument gives you the choice to play all four modes of the ID8 “Synth” patch, and then processes that patch through a variety of effects devices. The Pulsar is used to modulate the “Scream” distortion. From the Scream, the signal is split to an overlapping low and high band of frequencies, and in turn is processed through a Reverb (high) and Delay (Low). The signal is then merged back together and sent back the the output. Use Button 1 to change the distortion type from “Warp” to “Digital” and use the remaining 3 buttons to decide which of the four Synths to play through those effects. Rotary 1 adjusts the amount of Reverb, Rotary 2 adjusts the Reverb Decay, Rotary 3 adjusts the amount of Delay, and Button 4 adjusts the P2 parameter of the distortion (Bias for Warp and Rate for Digital).
The Pitch Bend and Mod Wheels are automatically mapped to the ID8. I really do wish you could assign different Pitches and Mods (you can have some limited assignments if you use the Combinator’s Mod Routing section, but yeah, it’s limited). The Pitch Bend will pitch the Synth sound up or down 2 semitones, which is standard for the ID8. The Mod wheel applies Vibrato to the synth.
-
Another Layered Synth
-
Layered Detuned Organ
These two synths use multiple Pulsar devices to create layered Oscillators sent to different Mix channels inside the Combinator. Adjustable parameters are the Amp Envelope Attack (Rotary 1), Amp Envelope Release (Rotary 2), Shuffle (Rotary 3), Level (Rotary 4), Detuning or Presence (Button 1), Presence or Vibrato (Button 2), Tremolo (button 3), and Mastering (button 4). The Pitch Bend wheel allows you to spread the synth layers across the stereo field (panning them) and Mod Wheel applies Reverb to the synths.
The cool thing about the Layered Detuned Organ is the fact that you can detune it using Button 1. This adjusts the rate differently for all three Pulsar devices (each pair of LFOs are set to a slightly different rate using the Envelope Rate knobs). This produces a much fatter “detuned” Oscillator sound. The “Presence” parameter accesses a set of delay devices set to very short durations (a la Haas effect). This effect raises perceived loudness without actually hearing the delays; resulting in a more spacious sound. The Vibrato and Tremolo are pretty basic, adjusting the pitch and amp modulations with other Pulsar LFO units.
The Another Layered Synth patch is similar, however, it only uses 2 Pulsars instead of 3, and the waveforms are different.
Note: You’ll notice an audible “plucked” sound when the synth notes are released. I have a feeling this has something to do with the way the rates are adjusted (detuned) in the Amp Envelope of each Pulsar device. However, I have not found a way to get rid of this sound. If anyone (Reason or Reason Essentials user) has any suggestions to get rid of it, please let me know.
-
Arced Archaic Arp
This patch use the Subtractor synth as the basis for generating the sound, and a series of Pulsars to mangle or modulate that sound. It creates a moving Arp-like synth sound, and boy do I sure love me some modulation. This is probably one of my favorite synths developed in this pack. A few special notes: The distorted Vibrato (Button 1) gives the synth a very driven metallic feel, which sounds more like distortion than vibrato. The standard Vibrato (on Button 2) is more akin to what most people think of as “Vibrato.” Using both of them together is probably not what you want to do, but separately they are pretty cool I think. Everything else on this patch is pretty self-explanatory.
-
Basic 4-Step Synth
-
Basic Saw Synth
-
Basic Sine Synth
-
Basic Slope Synth
-
Basic Square Synth
These synths are simple ways for the Reason Essential user to play Pulsar as a synth. They each use a different Waveform as the basic Oscillators, and the combined LFO 1 & 2 are used as a mono synth. Adjustable parameters are the Amp Envelope Attack (Rotary 1), Amp Envelope Release (Rotary 2), Shuffle (Rotary 3), Level (Rotary 4), Delay (Button 1), Distortion or Modulation (Button 3), and Reverb (Button 4). The Pitch and Mod Wheel are mapped to different parameters on different synths. The idea behind these synths were to create very simple dual oscillator synths that are the “bare bones” for Essentials users. But don’t let that fool you. There’s a lot of power in these little synths. For example, to get a really fat beefy sound, increase the “Shuffle” parameter mapped to Rotary 3.
-
Dominion
This is another bassy, filter-modulated sound (not really dubstep, but still kinda fun to play). It’s unique in that it combines a Subtractor Synth with the Pulsar LFOs-as-Oscillators, which was another interesting Reason integration idea I had. I used the RV7000 as an Echo (Button 3), and there’s some fun Scream distortion on Button 4. Note that you can adjust the mix between the two synth layers using Rotary 3 and 4. Most of the other controls adjust the Panning settings for the global sound.
-
Phi’s ID8 Bass Synth
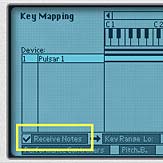
This synth bass patch uses 2 overlapping ID8 devices, with one of the Basses detuned down an octave (using the Combinator’s Transpose function – in the Key Mapping area of the Programmer). The sound is then processed through a Scream Distortion Unit to give it some more “oomph.” You can select between two different algorithms using Button 4, and then change Parameter 2 with Rotary 4. Release time is adjusted using Rotary 1, and Rotary 2 spreads the Basses a little bit in opposite directions in the stereo field. Buttons 1-3 allow you to Modulate a few different parameters with the Pulsar LFOs. Button 1 turns on the Volume modulation, Button 2 turns on the Bass Tone modulation, and Button 3 turns on the Distortion modulations. The Pitch Bend and Mod Wheels are hard-coded to the ID8 Bass devices. Pitch Bend adjusts the pitch up or down by 2 semitones, and the Mod Wheel is mapped to Bass Vibrato.
-
Pulsar Drum Gates [Btn 4=RUN]
It might be fairly self-explanatory, but you can’t play this instrument. Instead, you “Run” it using Button 4, which turns the whole thing on or off. Then you can adjust various parameters using the other Rotaries, Buttons and Wheels. The idea behind this patch was to create a kind of drum kit / song starter patch that uses the Pulsar devices as drum gates for the various drums. The Pulsars take over the role of the Redrum sequencer (or the main sequencer, for that matter). I particularly like how the Mod Wheel changes the kit’s sound entirely.
The other interesting idea with this patch was the CV connection from LFO 1 to LFO 2’s Rate input. Originally, I had thought about setting up each drum to be turned on or off by enabling LFO 2 to run or not (I discarded that idea in favor of level switches on the four Rotaries, but still used the on/off idea for the “FM Fuzz” on Button 3). Anyway, if you do turn your drums on/off using this method, and still want access to combine LFO 1 with LFO 2, sending the CV cable from one LFO to the other LFO’s Rate is the way to go. Otherwise, you could just send the Combination CV directly into the drum device’s gate. I hope that makes sense.
-
Rate Rhythm Synth
This patch is unique because of the kinds of modulations going on. Pulsar is used as an Oscillator, but the Subtractor’s Mod Envelope is being manipulated by another Pulsar. In turn, the Mod Envelope is used to adjust the rate of the Main Pulsar’s Oscillators, which gives it a rate wobble (vibrato during the decay and sustain stage of the envelope) which kind of sounds like a natural Horn instrument. There’s also some other manipulations going on in here, but I think that’s the one trick that is most interesting about this patch. It also goes to show you that you can manipulate any Subtractor parameters using the Pulsar’s LFOs.
-
Wave Sprinter
This was another idea I had in which the Wave shapes from the Pulsar are in a state of constant LFO flux. The Pulsar LFOs are used as Oscillators in this one. But since the Waves are constantly shifting, the sound they produce can be quite chaotic (aka: lovely in my world). You can alternate which waves are fluctuating using Button 2. You can also turn the Wave shifter off and on using Button 4. The Pitch Wheel affects how fast or slow the Waves fluctuate (Rate). Lastly, the Mod Wheel is very cool way to get an extreme pitch shift for the Oscillators in the main Pulsar. Hope you have some fun with it.
Effects
The effects were all designed as Inserts, but I don’t see any reason why you couldn’t use them as Sends as well. Here is what I’ve included, with a brief description of each.
-
Pulsating Chorus
-
Pulsating Delays
-
Pulsating Echo Multi-FX
-
Pulsating Scream
These effects were built with simplicity in mind. Essentially, they each use Pulsars to modulate the various parameters of their respective effects device (CF-101 Chorus, DDL-1 Delay, and Scream 4 Sound Destruction Unit.
Pulsating Chorus focuses on modulating the Delay and Rate of the CF-101 device. Feedback is mapped to the Pitch Wheel and Modulation mapped to Rotary 1. Try out both to get some extreme effects. There’s also a Pan control on Button 2 and a way to sync the panning to the tempo using Button 3. All other parameters affect the Delay and Rate of the CF-101 using two Pulsar devices.
The Pulsating Delays are a set of Delay devices set to different delay times for the Left & Right position in the stereo field. All the other parameters affect the Feedback and Dry/Wet signal of both delay units.
The Pulsating Echo Multi-FX patch uses two RV7000 devices set to the “Echo” algorithm. They are then processed through a Hi and Low Stereo split. Note that the delay times of each Echo algorithm is different. You can use the various Rotaries and Buttons to have Pulsar’s LFOs applied to various aspects of the Stereo Imagers (X-Over Frequency on Button 1 and Width on Button 2) and Reverbs (Master Volume on Button 4). Note that Rotary 1 adjusts the Cross-over frequency manually when not using the Auto-Wah on Button 1. The same goes for the Reverb Master Volume adjustment on Rotary 4. Because of this, when you turn off Button 1 or Button 4, the parameters of each device go back to 0 (Middle) for the X-Over Frequency, or 64 (Middle) for Reverb Dry/Wet; regardless of where the Rotaries are set – simply readjust the rotaries to get these two parameters back where you want after turning off Button 1 or Button 4. There’s also a Tremolo adjustment on Button 3, with its adjustable Rate setting on Rotary 3.
Pulsating Scream is a bit of a monstrosity and was probably the most challenging effect to set up. It uses some Pulsars to modulate the Damage Type, P2 parameter, and the Scream’s “Auto” parameter in the “Body” section. All of this can be turned on and off, and modulated to create some really crazy gated distortion or some very subtle chorus-like effects (for example, load the effect and turn off Button 1 & 2 — hear what I mean)?
One minor quirk with this Scream effect should be noted: Button 3 switches between the Feedback and Modulation algorithms in Scream’s damage section. However, if you automate the Damage Type (using Button 2), when you then go to turn off this automation, the Damage Type will always reset to “Feedback,” even if Button 3 is telling you the algorithm should be set to “Modulation” — simply press Button 3 two times and you’ll get back to the “Modulation” algorithm. Yes, I know there’s definitely a way to jury-rig this button to work more logically, but I was getting a little tired towards the end of developing that patch and I just didn’t have the mental energy nor dexterity to rework it. Either way, I think it’s a minor inconvenience. This patch is still my favorite out of all the effects patches.
-
Pulsator Tremolo & Pan
This is a combo effect patch that allows you to adjust both the Tremolo of any incoming signal, as well as the Panning of that incoming signal in the stereo field. You can combine the Tremolo with the original signal (Button 1), and adjust how much Panning and Tremolo is used to affect the audio. This is probably a close second on my list of favorite effects in this pack. The nice thing about it is how you can shape the combination of both Tremolo and Pan together.
-
Simple EQ Wah
There is a Wah effect that I built for the Pulsar which is included in the stock patches, however, it uses a Thor to do some CV trickery. So I developed its little brother here, which essentially does the same thing, but can be used by Essentials users. It’s a very simple concept. It uses the Pulsar LFOs to create both a boost and a cut in the EQ frequencies of the M Class Equalizer, and then make that boost and cut travel along the EQ’s frequencies. It produces a basic Wah sound. Use the various parameters in the Combinator to achieve a plethora of Wah-type wobbly sounds for your audio.
So that’s what you’ll find included in the free Pulsar Essentials Pack. If you have any ideas for additional patches, let me know and I’ll be happy to try to come up with new ones and include them here. Also let me know if you have any questions, or what you think of the patches in general. All my best for now, and happy Reasoning (essentially, that is).

