What’s on Your iPod?

Maybe it’s music making month that has me exploring more new music out there. Or maybe it’s just the fact that I’ve been rather introspective lately, looking at various sound design ideas, and needing to take a break from tutorial writing (don’t worry, I’ll be back with more tutorials soon). But right now I’m looking more at what other people are doing out there. Instead of writing a tutorial this week, I decided to present a few things that are inspiring me. My tastes lately have gone more ambient and less dubstep, drum n bass, and whatever other new “step” is the new vogue.

Maybe it’s music making month that has me exploring more new music out there. Or maybe it’s just the fact that I’ve been rather introspective lately, looking at various sound design ideas, and needing to take a break from tutorial writing (don’t worry, I’ll be back with more tutorials soon). But right now I’m looking more at what other people are doing out there. Instead of writing a tutorial this week, I decided to present a few things that are inspiring me. My tastes lately have gone more ambient and less dubstep, drum n bass, and whatever other new “step” is the new vogue.

So here are some of the things that are playing on rotation in my iPod, and some new material that has me going “wow, now that’s cool.” I’d be interested to hear what you all think of these artists and tracks. So feel free to comment and tell me what your opinions are. And let me know what you have on rotation in your iPod. Any ambient, drone, or glitch suggestions would also be welcome.

Seefeel: Seefeel (2011: Warp Records)

Seefeel - Seefeel

First and foremost is a CD that I recently purchased which at first listen didn’t catch me. The second time I listened to the whole CD front to back and it instantly connected for me. Now it’s the one CD I play from start to finish continually. It’s the number one CD on my iPod, and if you like your ambient served to you in a crunchy, distorted, and feedbacked guitar-based way, then this will certainly hit the mark. It’s Seefeel’s self-titled CD from this year, and I would definitely recommend it for some blissed-out mystical journey with a big kick.

What I really love about it is the lush layers, distortion, feedback, and the power that each track brings. After a 15-year hiatus, and a line-up change, they seem to still have what it takes to inspire me. And it’s nice to hear their sound get more gritty, and I think their choice to bring guitars back into the mix is spot on.

A note about the CD cover: This music feels exactly like the picture IMHO. Of course that’s why they’re called Seefeel.

Tim Hecker: Ravedeath, 1972 (2011: Kranky)
Tim Hecker - Ravedeath, 1972

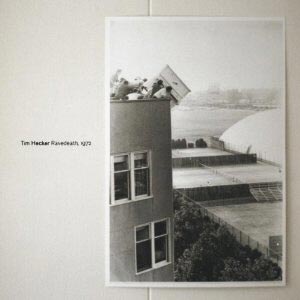
Perhaps it’s the fact that Tim is from my hometown (Montreal, Canada) that has me curious about his music. Or perhaps it’s the CD cover image of the first “Piano Drop” at MIT in my current location in Boston that has me intrigued. No, wait. Maybe it’s the fact that he’s done most of the recording sessions for this CD on a church pipe organ in Iceland. Well, now there’s just so many reasons to listen to this, that I couldn’t pass it up.

Interestingly, the music comes across very sparse, but very dense and all-encompassing. It’s broody and almost apocalyptic in nature. There’s elements of Eno here. There’s the spaciousness of emptiness. There’s the beautiful emmersive experience that just cries out “Ambient” in my head. This is what ambient can possibly be in the right hands. I can’t wait to get this CD and give it a full and thorough listen from start to finish. It’s the kind of music that forces you to lie in bed, close your eyes and just lose yourself in it.

Esselfortium: Seventeen More Times (2011: Esselfortium)
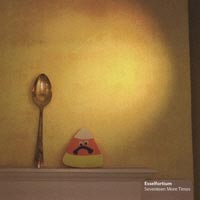
Esselfortium - Seventeen More Times

The moment I listened to this artist, I was hooked. The sampling is awesome and the sound is extraordinary. As one of the soundcloud reviewers said on his channel, he deserves more attention. And it’s true. I have Ed from EditEd4TV fame to thank for introducing me to this artist’s work. So have a listen. I don’t think you’ll be disappointed. That is, if you like ambient breakbeat. The one thing that struck me about Esselfortium is the connection it placed in my mind with older progressive bands such as Tangerine Dream. The feel is definitely there. But the sound is just as clean and melodies are more traditional.

Introjection by esselfortium

It’s worth a listen if you have a keen interest in quality musicianship, and still enjoy the founders of progressive ambient from the 70’s — Kind of like prog rock takes an ambient U-Turn, then came out to a complete stop in 2011. Nice work here.

School of Seven Bells (SVIIB): Disconnect from Desire (2010: Vagrant Records)
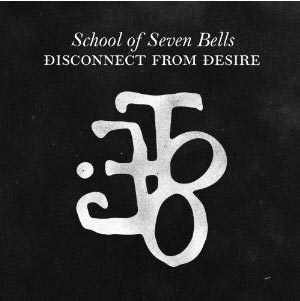
School of Seven Bells - Disconnect from Desire

I know this is more main stream, but I can’t seem to shake this off my iPod for anything. The vocals from twin sisters Alejandra and Claudia Deheza and the guitar and production work of Benjamin Curtis are really well put together. Cohesively shoegazish and very ethereal. The band seem to take off where My Bloody Valentine left off. Though this is their second CD, they still hold everything together well. Though, I still tend to like the first CD Alpinisms better, as I think it’s more raw. But there’s nothing wrong with this CD as well, and both get a lot of air time when I’m on the road.

I think I also have an affinity to them because they maintain their own blog. Something a lot of musicians don’t do, but should. Note to all you bedroom musicians out there: start a blog, get a website, and get your name out there!

The Orb: Metallic Spheres (2010: Columbia)
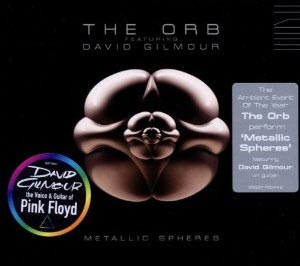
The Orb - Metallic Spheres

What list would be complete without something from The Orb. At least my list that is. Well, I can’t knock the Orb. They were pioneers of Ambient Dub, and broke out a whole generation of chilled out rave youths. So this purchase for me was a no-brainer. And the fact that they teamed up with David Gilmour (finally doing something Pink-Floyd-esque) is a bit of a treat.

I have to make a confession: I love long drawn out ambient tracks that progress and move over time. So to get a single track in two 20-minute parts was really nice. A clean break from the everyday 3-5 minute soundscape that everyone is used to. The tracks have a chance to breathe and develop. And that’s a very integral part to ambient as a genre.

So does this CD hold up. Yes and no. It’s a great CD overall, but it’s not what I would consider the best from either artist: The Orb nor Gilmour. For the most part, Gilmour voices a few words and does his guitar thing. And the Orb seem a bit tried, tested, and tired. It’s not that the CD is bad. It’s had a lot of listens from me already. It’s just that with the wealth of everything else out there, and with their track record for breaking boundaries, I guess I expected more from them. It’s still a very solid CD and the music production is really wonderful. But it also falls a little flat for me in places. I’m still a die-hard fan, but next to all their other ground-breaking work over the past 25+ years, it kinda made me go “eh. ok. so what?”

Still worth a listen though.

Mum: Yesterday was Dramatic — Today is OK (2000: TMT Entertainment)
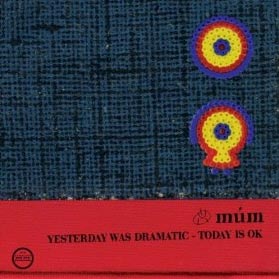
Mum - Yesterday was Dramatic - Today is OK

Still one of the best musical glitchy debut CDs of the decade, and gets a lot of airplay from me. I have most of their CDs, and I have to say this one is the best of the bunch. My favorite track is “Asleep on a Train” which just sounds like perfect music to fit the title. This group is from Iceland, and I would say this is one of the best “mood CDs” which fits my personality perfectly. It’s quirky, upbeat and downbeat from track to track and it weaves in and out of a really nice journey which makes the listener focus very deeply on what’s being played. Perhaps because I like to create music myself, I tend to listen harder than others. But I think this could have appeal for everyone who is willing to listen to some of the outer edges of our tiny little pop culture.

Most of their newer CDs since this one go down a very folksy path, and that’s not a bad thing. But it’s not necessarily MY thing either. This CD is much more electronic and glitch, and holds it’s head up high above a lot of others that were produced 10 years later.

Jonsi: Go (2010: XL Recording)

Jonsi - Go

This is the guy from Sigur Ros (I must have a weird affinity to Iceland this year). His first solo project was taken from lots of recordings that didn’t quite fit the Sigur Ros style. The CD is an interesting musical journey that is somewhat akin to Bronski Beat’s Jimmy Sommerville vocals, and modern day acoustic ambient. The cross-breading is superb. The best song on the CD by far is “Grow Till Tall,” the second to last track.

His vocals are haunting high pitch yearnings for what? I have no clue. But it all just works. And even cooler is that I heard a rumor that all the music on this CD is from acoustic instruments. No digital instruments. Which is refreshing in this day and age, and for this genre especially. Have a listen for yourself.


So that’s just some of the stuff loitering around my iPod or waiting to be purchased. Any suggestions based on these tastes? What do you think of these artists? I’d love to get your feedback. As always, never forget to stop and take a minute to listen to the music of others. It can be its own reward, and it will help tune you into sounds and ideas for music-making of your own.

61 – Generative Ideas (pt. 2)

Continuing our story about creating some random generative musical ideas in Reason, I’m going to take the Random Sequencers we built previously and find some usefulness for them. So hold on to your hat. It’s going to be a bumpy ride.

Continuing our story about creating some random generative musical ideas in Reason, I’m going to take the Random Sequencers we built previously and find some usefulness for them. So hold on to your hat. It’s going to be a bumpy ride.

You can download the project files here: Generative-Ideas-Part2. The files highlight the ideas I’m covering here. Note that some of the files work for Reason 4 and some work for Reason 5. C’est la vie.

Random Glitch Box

The Front panel settings on the "Glitch Box" Combinator

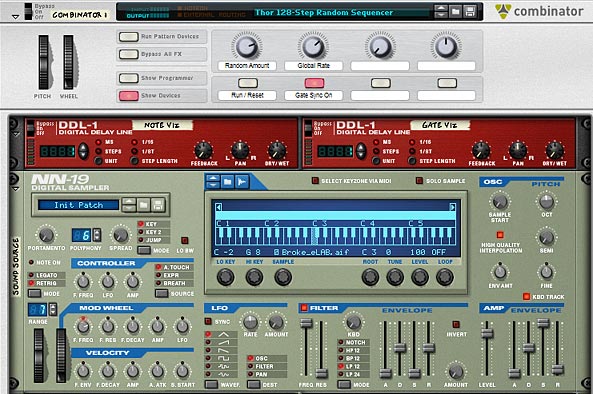
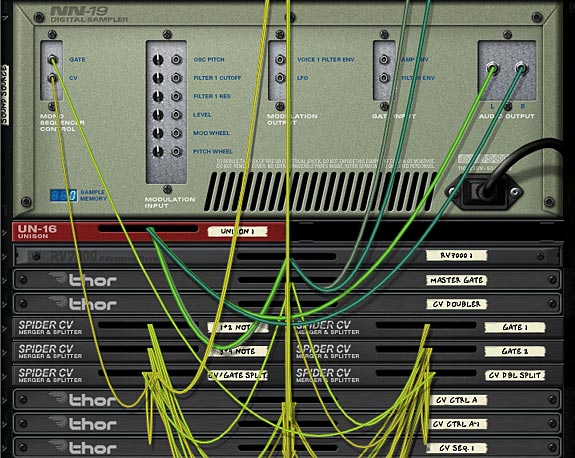
The first and probably best use I can find for these random generators is as a glitch box. Surprise surprise. This one really is a no-brainer. Just fire up the 128-step sequencer, duplicate the devices, and with a little reworking we have two separate randomizations: one for the notes and the other for the gate. Then load up a sample that spans the length of the keyboard, and this will be our “Grain Sample” which will be played via the sequencer Combinator. You can put the sample player inside the Combinator and just rewire the sound source CV / Gate inputs into your device of choice. Here, I’m going to use an NN19 for the sample.


The front of the Sampler glitch Box. It's almost like a Grain sampler, when you use the sequencer this way.


The back of the Sampler. You could also randomize the "Sample Start Time" if you wanted to go further with this idea.


Random FX

Remember that gargantuan “Key Flux FX Processor” I built oh so long ago? Well how about we fire up that bad boy and take it for the ride of its life. Using the same sequencer as above, we’ll plug it into the FX processor, and let it process any of your sounds. Just sit back and watch it cycle through all the various effects randomly. I think I could sit here for hours just listening to it doing its thing.

Crafting Some Useful Leads

Though this might not make any earth-shatteringly great lead tracks, you can make your sequencer more musical by implementing the following idea. First, take the 64-step sequencer, and change the notes around so that each of the four “Thor Sequencers” are 2-steps long. Then put the first two notes of your key (here we’ll use the key of C Major to keep it simple) into the first sequencer, the next two in the second sequencer, and so on. You will end up with this configuration:

Thor Sequencer 1: Step 1 = C3; Step 2 = D3

Thor Sequencer 2: Step 1 = E3; Step 2 = F3

Thor Sequencer 3: Step 1 = G3; Step 2 = A3

Thor Sequencer 4: Step 1 = B3; Step 2 = C4

Next, we’ll map the other steps so that we can add more of specific notes from the same key. In my patch I put more C, E, and G notes in the empty steps on the first Thor sequencer, and more of the D, F, A, B notes in the empty steps of the second Thor sequencer. I then added some sharps and flats into the third Thor sequencer, and additional suspended notes (and Octave shifts — i.e.: C4 notes) into the fourth Thor sequencer.

The steps in the first "Thor Step Sequencer" showing a C3-E3-G3-C4 pattern.

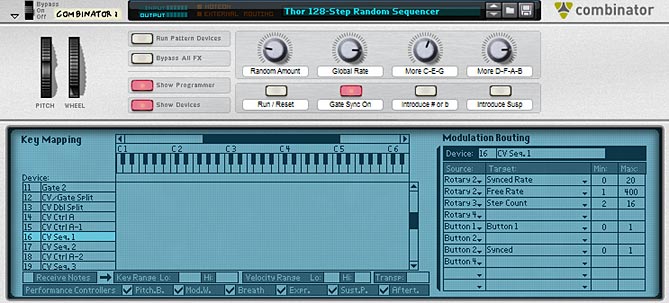
Finally, in the Combinator Modulation Routing section, I mapped the Sequencer > Step Length parameter of all four thors to Rotary 3 & 4, and Button 3 & 4 respectively. The min / max values on all were 2 / 16. This way, we can use the Rotaries and Buttons to add in further steps to increase the “weight” of them into the Random sequencer. For instance, if you turn up Rotary 1, you will introduce more C, E, and G notes. This has the effect of weighting those notes more than other notes in the key. In other words, the sequencer will “pick up” and “play” those notes more than the others.

The front of the Combinator, showing the Rotaries / Buttons. Note the Step Count is mapped to Rotary 3 to add more weight to C-E-G notes.

Of course if the Combinator had more Rotary assignments, you could weight each key separately using 8 rotaries. But that’s just not the case. But if you look at my Kongtrol articles from a few weeks back, you could very easily build it using Kong (wink wink, nudge nudge).

The patch I built only uses 1 octave range, but there’s nothing stopping you from building this across multiple octaves, up to 128 steps, using my random sequencer here. Or you can use the Transpose feature to raise it to two octaves. Or you could use the RPG-8 to force octave switches, but then you’re going to be inputting values into the “Main Sequencer” in Reason, and I’m trying to stay away from doing that.

Modulation, Modulation, Modulation

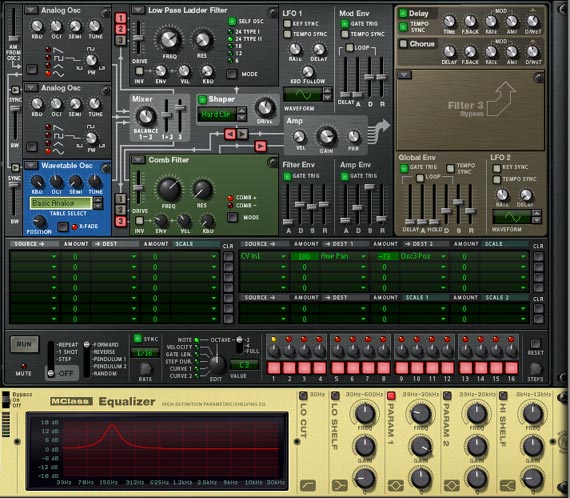
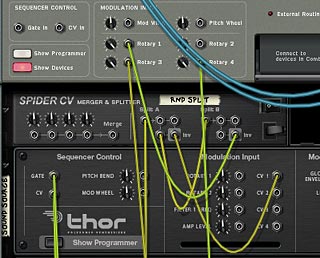
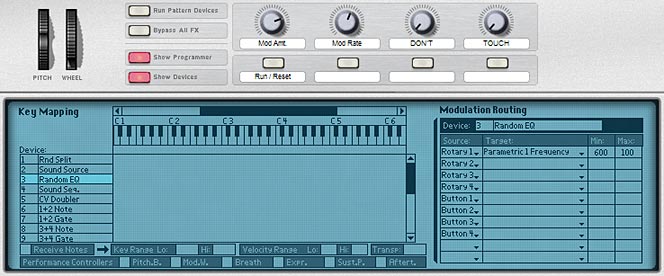
Another interesting use of the random sequencer is when you start to get into modulation. With a random setup, you can use the CV output to modulate parameters on any of the Reason devices, even ones that don’t have a CV input (using the Combinator Rotaries as the CV pass-through). Included in the file is a “Mods” patch which show you how to create a random EQ generator and also use the same random sequence to affect some parameters to the Thor sound source directly (via CV1). The Thor’s CV1 is then mapped to the “Amp Pan” and “Osc 3 Position” parameters. Note that in order to get the EQ Frequency modulated, you need to send the random sequence CV to a Combinator rotary first. Then in the Combinator’s Modulation Routing section, you can map the rotary to affect the EQ Frequency. In the patch I’m providing, I set the Min / Max values to 600 / 100, which provided some nice movement to the sound.

The front of the Combinator showing the Thor sound source and EQ, Both of which are modulated with the Thor Random Step Sequencer.


The back panel showing the Note CV sent to the Spider and then sent to Rotary 1 and the Thor sound source CV 1 input.


The front panel of the Combinator with the Programmer displayed. Note that the EQ Parameter 1 Frequency is mapped to Rotary 1. This way a parameter without a CV input can be controlled via CV using the Rotary as a pass-through.

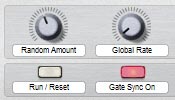
In a nutshell, if you open this patch, you can press play on the transport, which starts the sound. No modulation is affecting the EQ, Pan, or Osc 3 Position parameters yet. In order to turn on these modulations, press button 1 (Run / Reset). You will then hear the modulations taking effect. To select the amount of modulation applied, use Rotary 1. To affect the Synced Rate of the modulations, use Rotary 2.

Note: in this kind of setup, I only used the “Note CV” value from the random sequencer. The gate CV value was not needed or used. I also removed the CV visualization DDL-1 devices, so that the patch would be accessible for both Reason 4 and Reason 5 users. Note also that the CV values are inverted through the Spider so that Rotary 1 will gain more modulation when turned to the right. If the signal wasn’t inverted, turning the Rotary to the right would produce less modulation, which is counter-intuitive in my book.

Where do you go from here?

These are just a few ideas I had when I was playing around with the Random Sequencer I created. As I went from having the first initial “problem,” I ended up with several interesting sequencer patches and ideas. This just proves that if you have a single thought or problem, and you can solve it, you can end up going in a lot of different directions which lead to even more ideas and creative projects. So I guess my point is this. Find as many “problems” as you can, and then work toward solving them. Because that just might be the creative spark you need to start an imaginative wildfire.

One other place you could take this is to build an entire “generative” song, in which all parts of it are randomized. In this case, if you used the Thor sequencer here, you would end up with a song that is never the same way twice, and one which bypasses the Main Reason sequencer entirely. As a creative project, that would be quite an undertaking. But if you want creative ideas, there they are.

Another creative “generative” idea is to blend multiple LFOs together, so that you end up with a lot of variety. You could then take a third LFO and use that to apply to one of the two LFO’s rate or amount parameter. There’s all kinds of ways you can layer LFOs to come up with some pretty intricate modulation sources. But I think I’ll save that one for another article at a later date. For now, I’m pretty much done looking at Thor’s sequencer for a while. And it’s Music Making Month, so it’s time to actually make some music right?

PS: If you come across any other ideas related to this idea of “Generative” or “Random” music, please share them. I’d love to hear and take a look at what you’re working on. All my best for now.

35 – Glitch Box Redux (R4 & 5)

In this tutorial, I’m going to show you some new ideas for Glitch Boxes in Reason 4 and Reason 5. Because, hey, we can never have enough glitch boxes or IDM-style sounds. Just like you can never have enough creativity. Consider this a “Glitch Box (Part 2)” for those that missed my first installment.

In this tutorial, I’m going to show you some new ideas for Glitch Boxes in Reason 4 and Reason 5. Because, hey, we can never have enough glitch boxes or IDM-style sounds. Just like you can never have enough creativity. Consider this a “Glitch Box (Part 2)” for those that missed my first installment. And if you’re interested, go here for more: Glitch Boxes (Part 1).

Download the project files here: more-glitch-boxes This is a single zip file with one RNS file containing both Combinators. Since those with Reason 4 won’t be able to open the file, I’ve included the Combinators separately. Note that one of the Combinators is for Reason 4 and up, while the other one is for Reason 5. Sorry to those who can’t open the R5 file, but you at least get to use the R4 Glitch Box Combinator right?

Glitching up Keith LeBlanc via the Dr. OctoRex (for Reason 5)

I’ll start with the Reason 5 approach, which uses a Dr. OctoRex to apply some interesting variations to a single loop, then copies that loop multiple times into various different slots. Once that’s done, you change all the slice parameters in all the different loops. Then send the 8 audio outputs of the OctoRex to different FX devices (even the Kong FX) and back into the Mixer channels. Using this setup, you could even apply different mastering FX to the different outputs.

Incidentally, I’m using a rex file that’s located in the Factory Soundbank that was created by drummer Keith LeBlanc. I was supremely excited to see some of his material included in the FSB (among other very talented individuals). If you haven’t heard of him; he, along with Adrian Sherwood, Doug Wimbish, Skip McDonald, and even Mark Stewart, formed a group back in the 80’s called “Tackhead” which were revolutionary at the time. I would highly suggest you visit these links and explore them further on your own. While not the first band to ever use samples, they were one of the first bands to heavily rely on them for their music. And they ushered in the industrial hip hop genre which was an amazingly ecclectic mix of genres. Their music may sound a little dated now, but still gets me going. Definitely worth your time to explore. Luckily I have the original “Tackhead Tape Time” LP (yes, an actual original issue LP). But enough about that. Let’s get busy Glitching up Keith LeBlanc!

Once the basic setup is in place, you can go crazy editing all the slice parameters, but pay special attention to the “Out” or “Output” parameter. This is what will send the various slices to the various FX devices. So that’s going to have the most impact on how the slice is played.

Lastly (and this is discussed in Part 3 below), you can set up a few CV sources via Thor devices, and send them to the different FX device CV sources. In this way, you can take the Glitch Box to a whole new level of crazy. Don’t miss it.

Glitch Box (Redux – for Reason 4)

In this second approach, I wanted to give Reason 4 users another way to create some Glitch in their rack. This is an idea I got from delving into the Glitch Box Combinator that comes with the Factory Soundbank. It was an old patch that has been around since R3, and so it uses a few NN19s hooked up to a 14:2 Mixer, and the mixer levels are triggered by the Redrum CV Gate outs. In this one, I update the idea by using a few Thor devices. You can really have a lot of fun using a few different Wavetable oscillators, and changing around the LFO2 Wave types and rates between all the Thor devices (this is something I neglected to do in the video below, but I would think it would produce some interesting variations).  Anyway, this method can be used in R4 and above and is for all those who haven’t yet purchased Reason 5. But seriously, what are you waiting for?


So does anyone else out there have some good glitch ideas or know ways in which these combinators can be improved? Possibly adding some mastering or Reverb before they hit the mixer is one thought I had. Any other ideas?

Auto Glitcher Effect

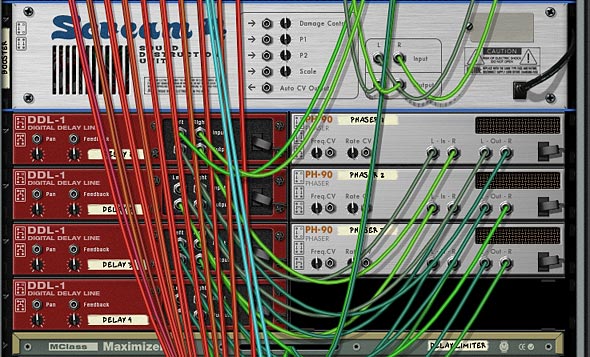
This is a Combinator which can be used to apply some Glitchy fun to any audio source you throw at it. It uses a Scream Distortion unit, 3 delays, and 2 Phasers which are controlled by some Malstrom Curves.

Download the Combinator: Auto-Glitcher

Description: This is a Combinator which can be used to apply some Glitchy fun to any audio source you throw at it. It uses a Scream Distortion unit, 3 delays, and 2 Phasers which are controlled by some Malstrom Curves.


 Here’s the complete rundown of the Combinator controls:

Pitch Bend: Unassigned

Mod Wheel: Affects the Rate of the Modulation curve which is tied to the Scream Damage Type. Raising the Mod Wheel makes Damage Type switching faster. Lowering the Mod Wheel makes Damage Type switching slower.

Rotary 1: Don’t Touch!: This Rotary is tied to the Damage Type of the Scream, but is controlled by the Malstrom Mod A Curve, and so does not need to be moved.

Rotary 2: Don’t Touch!: Like the previous Rotary, this one is tied to the Body Type of the scream, and is controlled by the Mod B Curve of the Malstrom, so it does not need to be moved.

Rotary 3: Damage: This controls the amount of Scream Distortion Damage applied to the sound source. Turned fully right, and you’re applying about 50% of damage to the signal (64). Turned fully left, and you’re applying very little damage (10).

Rotary 4: Wave: This controls the Malstrom Wave type (Modulation A Curve) which affects the Damage Type selection on the Scream. You can scroll through all 32 different wave forms in real time.

Button 1: Synch Off / On: This turns on the Synch on the Malstrom’s Mod A Curve (which controls the Scream Damage Type switching). When pushed in, Synch is on. When the button is off, the Synch is off.

Button 2: Body Off / On: This turns on the Body section of the Scream. When pushed in, the Body section is on, when the button is off, the Body section is turned off.

Button 3: Multi / Single Delay: This turns on the Multi-tap delay. When the Button is left off, the last delay in the sequence is the only one on (providing a simple delay to your sound source. When turned on, you have a full-on Multi-tap delay assault, with two Phasers in the mix as well.

Button 4: Damage Off / On: This turns the Damage on or off. When the button is left off, the Scream is bypassed, and when the button is on, the Scream unit is left on. It’s worthwhile to note that if you turn off the Damage, The Mod Wheel, and all the Rotaries will do nothing to your sound. The nice thing about Button 2, 3, and 4 is that you can minimize or maximize the amount of Glitch that is applied to the sound. For example, if you want to hear only a single or multiple delay, just turn leave button 4 off. If you want only the damage with no multi-tap, just turn off button 3. And finally, if you want the damage without the body section, just turn off Button 2. In this way, you can control what effects you want applied to your sound.

Other Notes: Feel free to change any of the Malstrom Mod Curves to curves that you like. Of course, for the Mod A curve on the Malstrom controlling the damage type of the scream, you don’t need to change this curve manually. You can change this using Rotary 4 (Wave). Or, if you want, you can also map any of the Curves to the “Wave” Rotary and have them move in unison together (or flip the min/max settings to change things up a bit). Alternately, you can program Rotary 1 to affect both the Damage and Body Types on the Scream, which could free up a Rotary for you. However, it would also mean that the Body type and Damage type would be using the same curve to control both those parameters.

Let me know if you find this patch useful and if you have any other suggestions for ways it can be made better? Or if you have some suggestions for other ways to get some glitchy fun out of Reason.

13 – Glitch Boxes

In this project, I’m going to create a few Glitch Boxes, and show you some techniques to get a little more glitch out of Reason. Though Reason isn’t built to be a glitch plugin, there are several ways you can connect things up to get some glitch mayhem from the devices.

In this project, I’m going to create a few Glitch Boxes, and show you some techniques to get a little more glitch out of Reason. Though Reason isn’t built to be a glitch plugin, there are several ways you can connect things up to get some glitch mayhem from the devices. When you then combine them all, you can have yourself a field day playing around with the knobs, wheels and buttons and work them into your own compositions.

So here I’m going to provide 3 different Glitch Boxes (incidentally they are color-coded just for fun), and go over some of the techniques that I think make them unique. Before I start, let me point out that I’m not going to go through the process of creating the Combinators from start to finish. Rather, I’m going to use the technique I outlined in the “Creative Redrum” tutorial series, where I added 10 synths and used gate triggering from the redrum to play these synths. The synths are the main glitch sounds, and these can be anything you like. The point is how you can use those sounds inside the combinator, and how you can add stylistic effects to get more out of them.

So let’s start our glitch journey in Reason.

The file for this tutorial can be found here: Glitch Boxes. The zip file contains 3 Combinators inside an .RNS file, each of which is attached to a mixer. To hear one of the combinators, just mute the other ones on the mixer. They weren’t designed to be played together, however, this was the easiest way to provide them to you all at once. Feel free to save them as Combinator patches and/or use them as templates where you can add in your own sounds into each of the 10 different synths in each of the Combinators. Also, don’t forget that you’re not only getting access to 3 patches, but you’re getting access to 30 synth glitch sounds as well. Enjoy!

Glitch Box 1 (Blue – Thors)

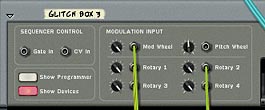
This Glitch Box uses 10 Thors to generate 10 different Glitch sounds, which are triggered by the Redrum Sequencer. The Redrum in turn has 32 patterns which are 64 steps each for a maximum Glitch mayhem. The interesting part of this patch is the way the Auto-sequencer is setup. By pressing the fourth button on the Combinator, the Auto-Sequencer kicks in and takes control to provide a very random output. It’s very easy to set this up. You just need to create a few Matrixes, and then send the Curve (or Note or Gate) CV into the Combinator CV inputs to control the overall playback of the Combi, or else any one of the Rotaries or Pitch/Mod wheels.


The rest of the Combinator patch is similar to the Creative Redrums 2 and Creative Redrums 3 tutorials, so I’m not going to delve into that right now. Please feel free to read through those tutorial in order to get familiar with the methods used to put together these patches. 

Here is a rundown of how this Combinator’s Rotaries and Buttons work:

Pitch Wheel: This raises or lowers the pitch of the 10 Glitch sounds at once by +/- 7 semitones.

Mod Wheel:  This dampens the sound of the Higher pitched Glitch sounds, essentially making things a little less sibilant.

Rotary 1:  Vocoder Filter – This Rotary affects the Thor Vocoder Modulation Filter. Use this knob to change the affect the filter has on the Vocoder. Basically, use this knob to dial in a sound filtering that appeals to you.

Rotary 2: Shift – This Rotary is used to raise or lower the “Shift” parameter of the Vocoder. Again, you’ll have to experiment with this knob to see what sounds best for you. You can also use it to create some interesting sweeps.

Rotary 3:  Pattern Sequencer – This knob allows you to select from 32 different Glitch patterns (all with 64 steps each). If you want to turn the patterns off, you can by turing the Rotary completely left (at zero). This turns off the patterns entirely so no sound signal will get generated.

Rotary 4:  Master Level – This is the Main Mixer’s master level. It allows you to fine-tune the volume of the overall mix.

Button 1:  Doubler – This essentially doubles the Glitch sounds. Beware, it can add a ton of beats. But if you mute a few of the glitch sounds on the Mixer or Redrum devices, you can have some fun using this button to thicken up and beef up your beats by automatically doubling them.

Button 2:  Alternate Filter – This adds a different filtered sound to the Glitch Box. It can be used to extend the Box to a whole new range of sounds. Experiment to see what you can do with this filter.

Button 3:  Master Bypass – This Button will bypass the Vocoder FX as well as the Mastering devices. If you want a very raw sound, this is the button to press.

Button 4:  Auto-Sequence – This button applies a random auto-sequenced element to the Glitch box. It not only acts as the note/gate CV for the Combinator, but also randomizes the first two Rotaries (the Vocoder Filter and Vocoder Shift parameters).

Glitch Box 2 (Red – Malstroms)

This Glitch Box uses 10 Malstroms to generate 10 different Glitch sounds, which are triggered by the Redrum Sequencer. The Redrum in turn has 32 patterns which are 64 steps each for a maximum Glitch mayhem. The interesting part of this patch is the way in which there are multiple Delay and Phaser units attached to the audio signal at the end. This creates a multi-tap delay effect which can be applied selectively.

Multi-Tap Delay setup (with Phasers)

Here is a rundown of how the Combinator Rotaries and Buttons work:

Pitch Wheel: This raises or lowers the pitch of the 10 Glitch sounds at once by +/- 7 semitones.

Mod Wheel:  This completely changes the type of sounds produced by the Glitch devices. Each Malstrom device was programmed to generate something totally wacky and off-the-wall when the Mod Wheel was used. So here is the result. Have at it!

Rotary 1:  Vocoder Filter – This Rotary affects the Thor Vocoder Modulation Filter. Use this knob to change the affect the filter has on the Vocoder. Basically, use this knob to dial in a sound filtering that appeals to you.

Rotary 2: Shift – This Rotary is used to raise or lower the “Shift” parameter of the Vocoder. Again, you’ll have to experiment with this knob to see what sounds best for you. You can also use it to create some interesting sweeps.

Rotary 3:  Pattern Sequencer – This knob allows you to select from 32 different Glitch patterns (all with 64 steps each). If you want to turn the patterns off, you can by turing the Rotary completely left (at zero). This turns off the patterns entirely so no sound signal will get generated.

Rotary 4:  Multi-Tap Delay – This adds some multi-tap delay effect to the glitch sounds. The Rotary acts as a dry/wet knob, so turning it fully left turns the delay off (dry), and turning it fully right turns it fully on (wet). Be careful as it’s easy to overdo it, and sometimes if other parameters are turned on (like Booster), the delay can get pretty loud. Though I’ve tried to limit the loudness of the delays with a Maximizer device. Just be careful not to overuse. 😉

Button 1:  Filter Type A/B – This changes the Thor Vocoder Modulation Filter from a simple Noise Oscillator to a different type of Noise Oscillator, and then adds in a Mixed sine Wavetable Oscillator into the mix. Try it out to change the sound entirely.

Button 2:  Bands 4/32 – This switches the Vocoder Band count from 4 (not pressed) to 32 (pressed in). Use this to keep the sound thin with 4 bands, or thicken it up with 32 bands.

Button 3:  Hold – This triggers the Hold button on the Vocoder. This can add some interesting unpredictible outcomes if pressed every so often. Or create a stutter effect by programming it to hold every bar, beat, or at random throughout your track.

Button 4:  Booster – This adds some emphasis and warmth to the sound via a Scream device.

Glitch Box 3 (Green – Subtractors)

This Glitch Box uses 10 Subtractors to generate 10 different Glitch sounds, which are triggered by the Redrum Sequencer, just like the other Glitch Boxes above. There’s 32 patterns which are 64 steps long, again like the other Boxes. There are a few interesting things happening in this patch, which I’ll go through one at a time.

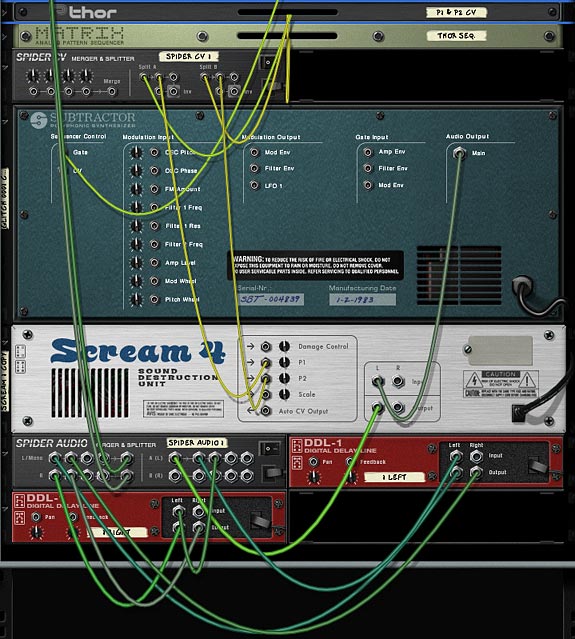
First, there are Scream Distortion units attached to each of the 10 sounds. The Screams are randomly sequenced to switch using the Matrix “FX Sequencer.” The Curve CV is cabled from this matrix to Rotary 4, which in turn is set to program all the Scream units to various degrees.

Second, there are two Digital Delay units attached to each of the glitch sounds. One unit is set up for the left, and the other for the right. Then they are merged together and sent back to the mixer. By changing the steps associated with each of these devices, you can set up some very complex delay patterns, which in turn enhances the “Glitch” element for each of the sounds.

The anatomy of a single Subtractor Glitch sound with Scream and Left/Right Delay FX

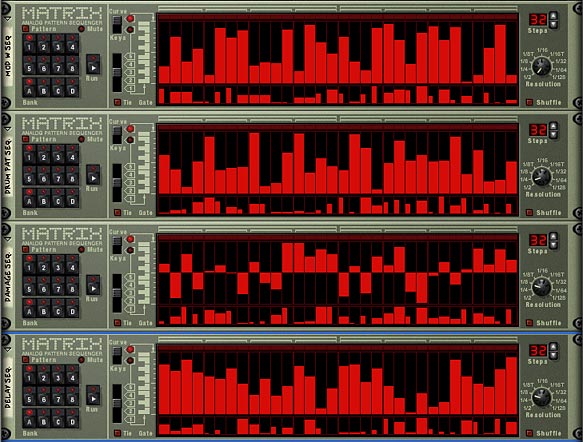
Third, Auto-Sequencing is set up so that there is an even more random element added to the box. Here, a matrix is set up for each Rotary as well as the Mod Wheel.

Auto-Sequencing the Mod Wheel and first 3 Rotaries. The fourth is controlled by the Matrix FX Sequencer.
The 4 Matrixes controlling the Mod Wheel, Pattern, Delay, and Scream Damage

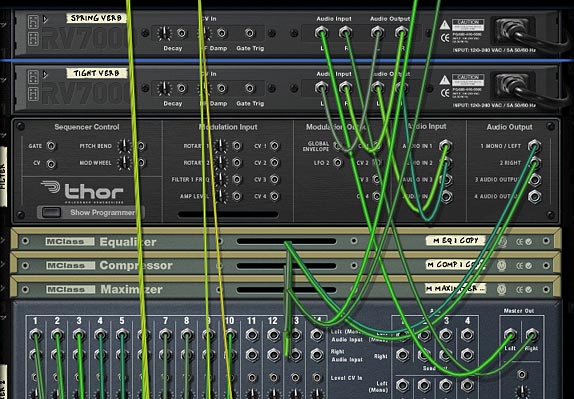
Fourth, there are a few other effects added into the Mix. If you’ve read some of the other articles, you’ll no doubt be familiar with ways in which the audio can be routed through Thor, and thereby use Thor’s filters on the audio signal chain. So I’ve added an alternate filter using this method. In addition, there are two Reverbs set up at the end of the signal chain in order to add a bit of room where the glitch sounds can feel at home.

Routing the Audio through a Thor Filter, as well as the 2 Reverbs

Fifth, and finally, The P1 and P2 parameters on the Scream devices are controlled via CV by a Thor device. The setup is that LFO1 controls P1, and LFO2 controls P2. So if you want to control these two parameters on every Scream device simultaneously, all you have to do is make changes to the LFO1 and 2 parameters in the Thor “P1 & P2 CV” device. This can help add some further Glitchy fun with the sound (especially when the Damage Type keeps changing randomly).

Here is a rundown of how the Combinator Rotaries and Buttons work:

Pitch Wheel: This raises or lowers the pitch of the 10 Glitch sounds at once by +/- 4 semitones.

Mod Wheel:  This affects a few of the Glitch sounds, but not too much. It’s pretty much unassigned.

Rotary 1:  Drum Pattern – This knob allows you to select from 32 different Glitch patterns (all with 64 steps each). If you want to turn the patterns off, you can by turing the Rotary completely left (at zero). This turns off the patterns entirely so no sound signal will get generated.

Rotary 2:  Delay Dry/Wet – This Rotary allows you to apply Delay to the Glitch sounds in a very random way (depending on how the steps are set up in each of your DDL devices. I can only recommend that you play around with the settings in these units, especially varying the steps on each unit). The Rotary acts as a dry/wet knob, so turning it fully left turns the delay off (dry), and turning it fully right turns it fully on (wet).

Rotary 3:  Damage Dry/Wet – This works the same way as the delay does (Dry/Wet), but this time the Scream’s damage knob is affected for all the Scream units. Be careful not to go too far overboard as you can end up making the sound pretty loud. I tried to limit it already a little bit by cutting off the amount of damage that can be applied, but it can still cause pretty loud signals. So just use it cautiously and always be on the lookout for your levels and clipping.

Rotary 4:  Glitch Hi <-> Lo – This essentially will turn off the amount of randomness applied to the Scream devices “Damage Type.” The way the Screams are set up, the matrix controls the damage type and randomly shifts from one type to another using CV to control this knob. If you keep it fully left, the Screams are at their most random; receiving switching cues from the matrix. When the knob is turned fully right, the damage type will not change at all and will stay fixed. So this Rotary controls how much randomness is applied to the Scream Damage Type, or rather how much switching between Damage Types will take place.

Button 1:  Spring Verb – This applies a spring reverb to the entire mix. Feel free to change the RV 7000 patch to anything that you feel suits this sound.

Button 2:  Tight Verb – This applies a tight reverb to the entire mix. Feel free to change the RV 7000 patch to anything that you feel suits this sound.

Button 3:  Comb Filter – This adds a comb filter to the entire mix to quickly change the Glitch sound. Feel free to change this in the Thor “Filter” device, if you like. It’s in the “Filter 3” slot.

Button 4:  Auto Sequence – This button applies a random auto-sequenced element to the Glitch box. It randomizes the Mod Wheel, and first 3 Rotaries (Drum Pattern, Delay, and Damage).

I hope this article provides a few new ways you can add to your Glitch fun in Reason. There’s probably a million different ways you can add Glitch into your tracks. I know Ed from EditEd4TV fame has just come up with a beat repeater that is quite amazing and interesting to look at. Visit the PUF (Propellerhead User Forum) for more information. And if you have any other ideas for ways in which you can make Glitch come to life in reason, please let me know. I’m always interested to hear about your techniques. Don’t be shy. Share them! And until my next installment, have fun in Reason and Record.

Cheers.

What Makes Glitch?

According to Wikipedia, Glitch is a term used to describe a genre of experimental electronic music that emerged in the mid to late 1990s. The origins of the glitch aesthetic can be traced back to Luigi Russolo’s Futurist manifesto The Art of Noises. But what makes good Glitch?

As defined by Wikipedia:

Glitch is a term used to describe a genre of experimental electronic music that emerged in the mid to late 1990s. The origins of the glitch aesthetic can be traced back to Luigi Russolo’s Futurist manifesto The Art of Noises, the basis of noise music. In a Computer Music Journal article published in 2000, composer and writer Kim Cascone used the term post-digital to describe various experimentations associated with the glitch aesthetic. Glitch is characterized by a preoccupation with the sonic artifacts that can result from malfunctioning digital technology, such as those produced by bugs, crashes, system errors, hardware noise, CD skipping, and digital distortion. Cascone considers glitch to be a sub-genre of electronica.

Production Techniques: Glitch is often produced on computers using modern digital production software to splice together small “cuts” (samples) of music from previously recorded works. These cuts are then integrated with the signature of glitch music: beats made up of glitches, clicks, scratches, and otherwise “erroneously” produced or sounding noise. These glitches are often very short, and are typically used in place of traditional percussion or instrumentation. Skipping CDs, scratched vinyl records, circuit bending, and other noise-like distortions figure prominently into the creation of rhythm and feeling in glitch; it is from the use of these digital artifacts that the genre derives its name. However, not all artists of the genre are working with erroneously produced sounds or are even using digital sounds.

Popular software for creating glitch includes trackers, Reaktor, Ableton Live, Reason, AudioMulch, Bidule, Super Collider, Usine, FLStudio, MAX/MSP, Pure Data, and ChucK. Circuit bending — the intentional short-circuiting of low power electronic devices to create new musical devices—also plays a significant role on the hardware end of glitch music and its creation.

Great. But what makes good Glitch? I’ve often pondered this question and think I’ve come up with a few characteristics of the genre.

  1. First, Glitch music has to have some balance of “randomness” or “chaos” and structure. It’s the tension between these two that give the song its listenable and deep quality. Something to be thought about, something difficult, and something that is not easily taken in by a single pass.
  2. Second, I think good Glitch music explores sonic possibilities, or rather, sonic IMpossibilities. If you listen to the works of Autechre and Aphex Twin, some of their glitchiest of tunes are interesting sonically because they use sounds that are not created by traditional musical instruments, and they explore speeds at which no human can play, even if they were created from a human instrument. Or, they create layers of sounds that are so out there and other-worldly that people would question the notion of the sounds being musical at all.
  3. Third, Glitch is not imitative. It does not try to mimic anything found in nature, but rather tries to break new ground by creating something completely new that you wouldn’t necessarily find in nature. I think this is why a lot of glitch artists turn to mechanic or machine sounds to create their music. It takes them further away from nature and more in the realm of the “man-made.” It’s not organic sound. It’s synthetic.
  4. Fourth, good glitch makes you think. Period. Perhaps that’s why us Americans refer to it as “Intelligent” Dance Music (or IDM). And while I know my brethren in the U.K. cringe at this very notion of terming any kind of music “Intelligent” (the argument as I see it stems from the fact that by labelling any one music “Intelligent” you automatically relegate all other music into the “non-intelligent” dogpile — something which I doubt was ever intended), I still think that you have to use what’s between your ears to fully appreciate glitch. I’m not saying any other music is any less intelligent or intellectual. But Glitch is not pop either. It’s not for the masses, and it’s not for those that want to immediately glean everything from one listen. It’s not background music.
  5. Finally, I think good Glitch uses the unexpected and surprising to capture or hold one’s attention. Whereas most music uses traditional hooks, such as filter openings, drum fills, or other crafty ways to keep a listener’s attention, I think Glitch tends to use more chance happenings and unexpected “free-for-alls” to keep you moving forward through the track. For example, a sudden switch from a wide-open reverb to a small space reverb, or a sudden jump in EQ. Or perhaps a major shift in tempo (as Autechre is fond of doing). All of these things seem to pay homage to the origins of the word Glitch: “erroneously” produced or sounding noise. The art of mistakes.

I would say if anyone has a further interest in the subject, they should definitely read up on the Art of Noises, a Futurist manifesto written by Luigi Russolo in 1913. A nice little summary can be found on Wikipedia. If Russolo were alive today, I think he’d be a fan of works by Autechre and Aphex Twin. I think he’d be supremely impressed at how we use computers as tools to create an infinite array of “noise-sounds” which we couldn’t create before. What I find very interesting is how so many sound designers work so hard to re-create sounds of traditional instruments. I think if Russolo were around he’d probably encourage them to forget about traditional instruments and instead focus on creating new experimental sounds that are unlike anything we’ve heard before. But perhaps that’s a thought for a future(ist) post.

What are your thoughts on the subject?