Dark & Light (2 CD Set)

The long-awaited new original Phi Sequence album and Phi Sequence Remix Project album are here. 30 tracks. Over 2 hours and 15 minutes of original music by myself and 8 other amazingly talented musicians and producers well known within the Reason community.

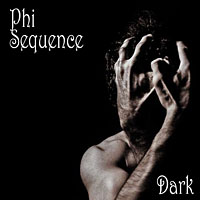
Dark: Original music by yours truly. 90% of this album was made entirely with Reason 6 and the Reason 6 FSB.

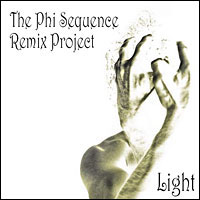
Light – The Phi Sequence Remix Project: Remix compilation of various tracks on the “Dark” album.

The long-awaited new original Phi Sequence album and Phi Sequence Remix Project album are here. 30 tracks. Over 2 hours and 15 minutes of original music by myself and 8 other amazingly talented musicians and producers well known within the Reason community.

Buy CDs | Buy Downloads | “Dark” on CD Baby | “Light” on CD Baby | Phi Sequence


Dark: The latest album release by Phi Sequence. 16 Tracks and over 65 minutes of music.
Dark: New original music. 16 Tracks. 67 minutes.

Light - The Phi Sequence Remix Project. 14 Tracks and over 65 minutes of music.
Light - The Phi Sequence Remix Project. 14 Tracks. 68 minutes.

Dark: Original music by yours truly. 90% of this album was made entirely with Reason 6 and the Reason 6 FSB. You can listen to the tracks below and purchase individual tracks or download the entire album.
Dark by Phi Sequence

Light – The Phi Sequence Remix Project: Remix compilation of various tracks on the “Dark” album.

Light – The Phi Sequence Remix Project by Phi Sequence

And now, how about a few free MP3s? The first two tracks in the set below are two that didn’t make the albums, so I’m giving them away for free. The others are older tracks and demos from previous releases:

Phi Sequence Free Downloads by Phi Sequence

Here are a few videos I came up with for the songs. Have a look/listen and let me know what you think.

And here are two videos that Myk (aka: TheFatControlleR) did for his remixes of “Mid-Blank” and “Light”:


From the Liner Notes:


Dark:

Thanks to all the Propellerheads out there for producing great software, and to all those who contributed to the Factory Sound Bank. 90% of the material here came out of that sound library, except for “Enlightened,” which was based entirely on Bitley’s DeLight ReFill.

Special thanks go out to James Bernard, Ed Bauman, Kurt Kurasaki, Hydlide, Mattias, Leo, Jiggery, Robb at Patch-a-day, Ben at 3rdFloorSound, Selig, Theo (NAA), Koshdukai, Sterievo, Pushedbutton, Ned Rush, Jeremy Ellis, Lewis Filter, Grumo, Vish, Rob Puricelli, Chris Petti, Noel Gonzalez, Kibeja, Ces, Jeremy Wright, everyone on the PUF, SoundCloud, FB, Twitter, studio662.net, and so many others whom I’ve met in passing or perhaps forgot to mention.

Thanks to Holly Nelson for vocal work on “Twin Tines.”

Thanks to Nicolas Delmotte for mastering all these tracks with complete professionalism.

Thanks to everyone who contributes, comments, and shares creativity on Reason101.net.

Your ideas and designs always inspire, and contribute to my relative sanity.

– Rob / Phi Sequence – February, 2012


Light:

Art is not solitary. In order to grow, we must listen to others and open ourselves up to reinterpretations of our work. This project comprises the work of 8 musicians and producers who provided their talents and skills to reinvent my work. The concept was simple. I provided 20 songs they could remix in any way they chose. This is the outcome.

When I started this project, I had no idea how far it would reach, how much I would learn, nor how much feedback
I would get. What I received in return was innovative and inspiring. The work speaks for itself. And I am truly grateful to call them my friends. My eternal appreciation to them for providing their time and artistic vision. I am humbled for the experience.

– Rob / Phi Sequence – February, 2012

Vocal Artist:
Holly Nelson (A Million Tiny Architects) – amilliontinyarchitects.com

Remix Artists:
Brent Rossen (Dig Team One) – soundcloud.com/digteamone
Mick Comito (Dr. Soul) – facebook.com/Dr.Soul.MickC
James Hopkins (The Velvet Conspiracy) – facebook.com/thevelvetconspiracyband
Craig Hansen (Bashcoder) – bashcoder.com
Myk Ripley (Mr Meeks) – thenovalounge.com
Brian Findlay (EpiGenetik) – soundcloud.com/epigenetik-1

Mastering:
Nicolas Delmotte (Odarmonix)


Once again, a huge thanks to all who contributed and all those looking to purchase. Let me know if you have any questions.

Buy CDs | Buy Downloads | “Dark” on CD Baby | “Light” on CD Baby | Phi Sequence

New CD Release! 2011 Kicks off

2011 is here and it’s time to kick off the new year, get back to work with some crazy ass tutorials, make music, patches, refills and all other kinds of crazy things. To start the year off, I’ve released a new CD which you can check out at CD Baby.

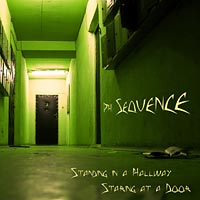
New EP: Standing in a Hallway Staring at a Door2011 is here and it’s time to kick off the new year, get back to work with some crazy ass tutorials, make music, patches, refills and all other kinds of shenanigans. To start the year off, I’ve released a new CD which you can check out at CD Baby: Standing in a Hallway Staring at a Door.

This CD comes out of several more melancholy ambient tracks that I’ve been toying with all year and whittled down into a 37-minute EP carpet ride. It also was part of a challenge of mine to stick to the sounds that are found in my Generations refill. To that end, about 99% of the music on the CD is from that refill. A challenge to be sure; my fingers kept venturing into some of the other finer refills in my collection. But will power called me away and demanded I try creating something fully “mine” this time around. It was the first time I did and I’m pleased with the turnout.

I’ve also released a free download which is an alternate demo version of the last song on the CD (Locked), which you can find here in my trusty Soundcloud widget below. Feel free to have a listen, download, and share the tune. Just be sure to let them know where they can find the full CD if you do. Your help spreading the word is always greatly appreciated.

Locked (Demo) by Phi Sequence

Enough about that blatant self-promotion stuff. Now what tutorials do you want to see in the coming year? What types of sounds would you like to have in a refill? What general thoughts do you have about Reason and Record. Share your tips and tricks and fantastic creative voyages you’ve had with the software. I’m all ears.

1 – Record as a CD Mastering Tool

My task a few weeks ago: To turn Propellerhead Record software into a CD mastering tool. Learn how to master 12 audio tracks in Record. A Record Template file is included.

So my task a few weeks ago: to turn Propellerhead Record software into a CD mastering tool. Keep in mind most of my tracks were already created in Reason and mostly fully formed. I had 12 tracks to master. My results:

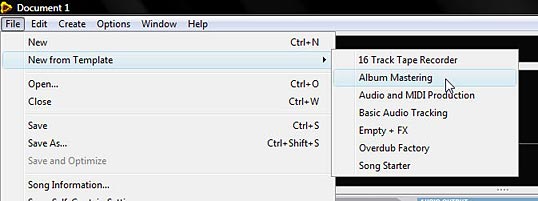
  1. Open Record and go into File > Create from Template > Album Mastering. The template opens with the default mastering suite as an insert effect before 10 empty audio tracks. Ok. not great. But just ok. I think what would have made it better here is if there were some reverb already plugged into the master FX sends, with all the sends switched on the master mixer and set to a low value (saving some steps here would do wonders). Though, since you can create your own templates out of anything, it’s not a major issue.
  2.  
    Opening the Record Album Mastering Template Opening the Record Album Mastering Template


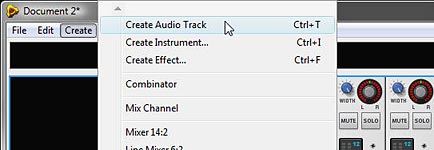
  3. I created two additional audio tracks (I have 12 tracks in total on my new CD project, not 10).
  4. Adding 2 more audio tracks to the template
    Adding 2 more audio tracks to the template
  5. I updated the master insert effects with the mastering combinator. Under the Master Section, click “Show insert FX” to expand the FX section, and update the empty mastering suite with your own mastering FX. In this case, I used the “Dance” combinator, as I really like the sound that this mastering combinator gives to my own music. I realize that usually this is the last step when mastering the mix, and this may seem kind of backwards, but I find that once I have all the tracks laid out and they are ready to be mastered, I’d rather listen to how these FX work with each track and do all the final adjustments from there. And if you don’t want to do it this way, you can always bypass the Insert FX with the click of a button, toggling the dance combi on and off. A great way to see how it affects each track.
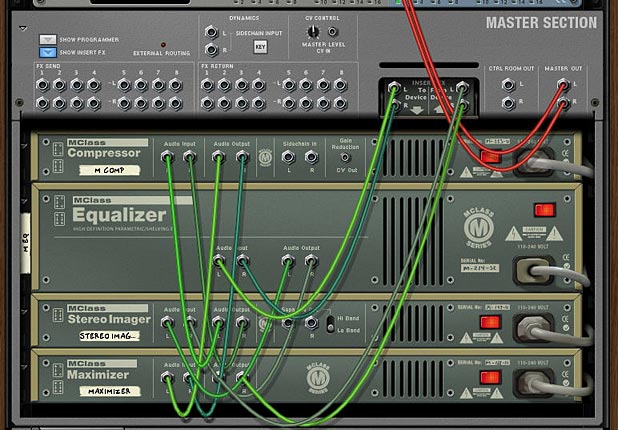
  6. Note: since you can’t insert a combi inside the master section, one way to add the Dance mastering combi in there is to first right-click over the front of the master section and select “Clear Insert FX,” then create the dance combi underneath the master section (hold down shift, so it is not auto connected. Expand it, select all the devices inside it and then drag them into the master section. Flip the rack around and move the blue “To Devices” L and R cables which are still connected to the dance combi to the master sections “To Devices” L and R cables. Do the same for the “From Devices” cables and then delete the now-empty dance combi. Voila, the Dance combi and all connections are inside the master section as Insert FX (see the image below for a look at the back of the rack and the connections.

    Back of the Master Section with a Mastering Suite Combi attached
    Back of the Master Section with a Mastering Suite Combi attached
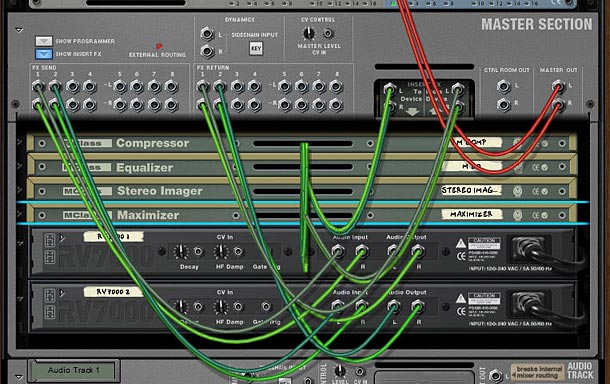
  7. I added two reverbs as send effects I added the “All Plate Spread” and “All Warm Plate” RV7000 units as send FX in the Master Section. I also set the dry/wet amounts very low (setting on 5 for each). This was done to add a little smooth reverb to all my tracks and make them “fit” or “glue” better together (see step 1 above — would have been nice if this step was already done).
  8. Adding the two Reverbs as Send FX
    Adding the two Reverbs as Send FX
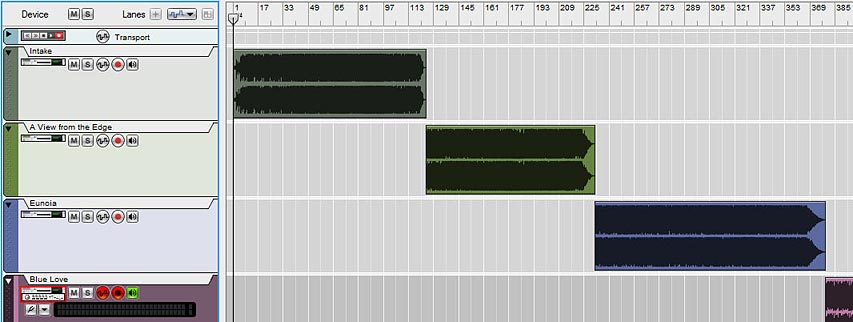
  9. Added each song (wav) file to each of the audio tracks using the File > import audio track on each channel and set them up one after the other in the sequencer timeline.
  10. Note: You can also set your tracks up on top of each other in a stack if you prefer. This is probably a wiser course of action, but as this was my first time using Record to master my CD, I opted to try laying things out on a timeline. The benefit to laying it out sequentially is that you can track the total time of your songs combined. The downside is that it makes for a real pain when it comes to bouncing each song individually to a wav file. There’s a lot of movement of the L / R markers in the sequencer at that stage.

    The tracks laid out in series within the Sequencer
    The tracks laid out in series within the Sequencer

    Note: it was at this point I realized something. I had one track out of the 12 whose tempo was faster than it should have been. It took me a while, but I figured out that this was the only track that was output from Record, not Reason. When you import an audio track that was produced with record, it understands the tempo data from the file (The track was 100 bpm, while my “CD Mastering” project tempo was 120). If you import a wav file that was created via Reason’s export, it shows “no tempo data” which I still find a little odd.

    Soooooooo…. I went to the tempo transport in the sequencer and switched the tempo to 100 for the duration of that one track. Problem fixed.

    It was also at this point that I was glad that Record didn’t make the connection and understand the Reason song tempos. Otherwise I’d have to go back and write down the tempo of each of my songs, and then change the transport’s tempo over each song to match. What a pain that would have been.

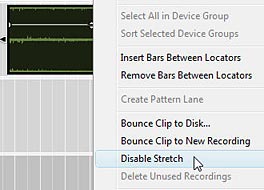
    Update: Mattpiper provided this nice little tip which avoids having to use the Tempo Automation Track: “In Record, you can right-click on any clip and select “Disable Stretch.” Then the clip will not have its tempo affected by the song tempo.” — Thanks Matt!

    Disabling Stretch by right-clicking on the audio clip in the Sequencer
    Disabling Stretch by right-clicking on the audio clip in the Sequencer

    Back to my strategy:

  11. Turned on “send 1” and “send 2” for all the audio tracks so the reverbs I set up were audible. Adjusted the send levels for each track to taste.
  12. Adjusting the Send levels in the Main Mixer
    Adjusting the Send levels in the Main Mixer
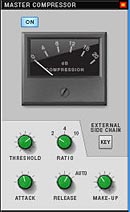
  13. Now the hard part: On the Main Mixer I adjusted compression settings for the Master Compressor, as well as for individual tracks. Also adjusted the LPF/HPF on some tracks, though not very much because as I say, all the work was already done in reason, and I didn’t want to go overboard. This process took a few days as I didn’t want to rush it and suffer from ear fatigue when adjusting these settings.
  14. Final adjustments with the Master Compressor
    Final adjustments with the Master Compressor
  15. Now the hard part (part 2): listened to each track once or twice and adjusted the volume levels so that they were just below clipping. My intention was to have them all evened out. I got about halfway through and called it quits for the night. Finished it in about 2 nights. For what it’s worth, I find that even if the song shows clipping in Reason or Record here and there (via the clip out light on the transport panel), as long as the clipping light is shown infrequently, and they are short clips, it doesn’t affect the final mixdown or output. Since this is the final adjustment before bouncing, I don’t mind pushing it. If I were still in the mixing stage, I would leave more headroom (about 2-3 dB). 
  16. Set up the L/R markers in the sequencer and bounced each song (LOOP) to an audio file individually. Loop is in caps for a reason. Since all the tracks are in the sequencer in sequence (how self-reflexive), each song is really considered a loop by the software. So don’t make the mistake of bouncing the song, otherwise you’ll end up with one huge wav file of the whole CD (of course, this may be what you’re after, but probably not).
  17. It’s times like this I wish I could set up multiple start/stop markers within Record, and bounce them all to individual tracks with one click of a button. But Record just isn’t there yet. Note to props: this would be a great addition! Also, the whole project turned out to be 1.5GB, so it’s not for the feint of heart. But it’s worthwhile to do if it’s going to make all my tracks have a certain amount of consistency across the board.

Now tell me: do you think this is an approach that makes sense? I know we all have different approaches when it comes to mastering, but is there anything you would do differently? Anything you would add or subtract from this process? Any suggestions to improve this process? Would anyone care to share their own process using Record?

If you would like to listen to the final result, all the tracks on the CD can be found here: http://www.phisequence.com

Also, if you would like the template file, I’ve created the one I set up here, with the Dance Combi and Reverbs in the Master Section, as well as all the sends turned on. I also added the extra two audio tracks:

Download the cd-master-tpl (zip file)