When you get a creative spurt, don’t dismiss it! Make sure you embrace it, accept it, harness it, and get it out of you immediately. Most importantly, learn to understand it’s happening (or when it’s about to happen), and let it ride for as long as you can. I can tell you this because from experience you will have dry spells and they tend to last longer than the creative spells. So it’s important to read the signs and act on them.
You can download the project files here: 7-Songs-in-7-Days. There are 2 song files zipped up. Note that they are a “.reason” format, which means you need Reason 6 in order to open them. But even if you don’t have Reason 6, you can follow along with the project below, watch the video and adjust it for previous versions of Reason. You’ll probably also learn more by doing it this way. The first song is “7-songs” which is outlined in the videos below, and the second is “Crease Kink” which I threw in there in case you want to remix it or play around with it. Have some fun with it, but remember that I own the rights to it. So if you use it, please let me know and I’ll showcase it here (to date no one has yet to do something with one of my files, but there’s always hope). 🙂
Usually when I’m in a dry spell, I tend to notice it pretty quickly. And when I do, I immediately shift gears and work on a different project. For example, recently I was creating nothing. It happened about 3 months ago. So shifting focus, I started working on designing sounds — LOTS of sounds. Rather than sit at my computer with a blank canvas open or hacking away at nonsense, I shifted focus. This does two things:
- It gets your mind out of the clouds and away from the blank slate.
- It usually rejuvinates you and lets you recharge your batteries. Kind of like a holiday. We all need them from time to time to rest and clear the mind.
When I got back (and after producing my latest Pureffects ReFill), I was more creative than I’d ever been. And this is all just a long-winded way of saying I brought on a new challenge for myself. Let’s create 7 songs in 7 days. Not an easy challenge, to be sure, but a very fun challenge nonetheless. And though not every song is spot on, most I’m happy about, and with a few modifications, I could say they are finished.
First: The Songs
So first, here’s the songs in order of creation (day by day). Skip all of this if you just want to get to some of the good tricks that I used inside them. You’ll find some of those tricks down below. Otherwise, please have a listen and comment. One can never have too much feedback.
Day 1: Friday October 14, 2011 – Crease Kink (Glitchcore)
Day 2: Saturday October 15, 2011 – Redaction (Dark Ambient)
Day 3: Sunday October 16, 2011 – 200 Years (Dark Ambient)
Day 4: Monday October 17, 2011 – Lens Fold (Dark Experimental)
Day 5: Tuesday October 18, 2011 – Vicious Viscous (Dance)
13 – Vicious Viscous by Phi Sequence
Day 6: Wednesday October 19, 2011 – Severed (Electronica)
Day 7: Thursday October 20, 2011 – Palatinate (Electronica Dance)
Second: The Methods & Tricks
Now for a few tricks. I thought I would show a few ways I went about creating some of these songs. It’s not really a formula, but it’s a way I used to start off these songs and keep going in order to create so many in such a short time. There are, of course, a million and one ways to create songs. This hopefully will show you a few techniques that might inspire you to jump into a new direction with your own music. I hope so.
Before I start, let me first say that a lot of the time, I’ll create all the sounds from scratch using the Reason synths. But for the sake of efficiency, and in order to create a song every day, I opted for the approach of using patches in the Factory Sound Bank (FSB) for all the instrumentation, and my Pureffects ReFill for some of the effects. Since I had already created thousands of effects patches (and some in the FSB as well), why not put them to good use. In this respect, it was a bit of a novel approach for me, but one that was very rewarding.
Let’s start by looking at the videos on how I started out a song. This gets you about 50% done in less than an hour.
Of course, after these tutorials, there is still work to be done. Mainly some EQ work on the various elements, continuing with the arrangement in the sequencer, throwing in additional elements to spruce it up a little, adding compression here and there, gluing the track together with a Reverb or two, adding a mastering suite to open up the track, and finally using the Master Bus Compressor from the main mixer (if you choose). But this is where I’m going to leave you for now. If you want to pursue these tracks, I have put two in the Download up at the top of the tutorial. Feel free to work on those and come up with your own mix. If you do, please share it with us so we can have a listen.
Starting off with a few Drums
Let’s start at the beginning. Usually the first thing is to start with your drums. That’s a normal starting point for most tracks. So we’ll start with a Redrum. Now normally, you have an idea in mind before you start a track. But I seldom work that way. In truth, I usually lay down a few drum sounds in a pattern in the Redrum and wait until I hear it. I then start to get a certain idea of how to shape the sound and where it’s going to go. In this respect, the song becomes a combination of what I hear first, and then I make decisions on how to shape it as its playing. This is usually backwards from the way most people would compose. But it’s worked for me in the past. So I’m going to do the same thing here.
Once you create a redrum, open up the assorted kick drums in the FSB, and add one into the first channel. I usually keep them playing as I’m selecting them so I can get a feel for what I’m going to use as a Kick drum. Once that’s done, I flip to the back of the rack and send the Gate Out from Channel 1 into the Gate In on channel 2. I do the same thing between channels 2 & 3. Then flip to the front of the rack and select Drum Channel 1. Lay down a pattern (usually I lay down a 64 step pattern to take full advantage of all the steps in the Redrum, and to have something that sounds like it has a lot of changes throughout). Since I’ve connected the Gate channel 1 to channels 2 & 3, I can layer the kick with 2 other kick sounds, but I only have to enter 1 pattern in the Redrum. This speeds up the workflow a little (and is why you should get familiar with your CV connections!).
So now add two more kick drums in Channels 2 & 3. Once this is done, I shape the levels, length & pitch of all 3 drums together. It’s at this point that I start to get a feel for how things work together. If something isn’t working right, I’ll either change one of the samples, or adjust those parameters.
Next, I add 2 Snare drums in channels 4 & 5 and use the same gate CV trick between the two. This means I need to create a snare pattern on channel 4.
And finally I’ll create 2 Hi Hats on channels 8 & 9 – and set the button to have exclusive sounds between those two channels. This way I can set up an open hi hat on 8 and a closed hi hat on 9. Though, I don’t always use open / closed Hi Hats. But it’s there if you want.
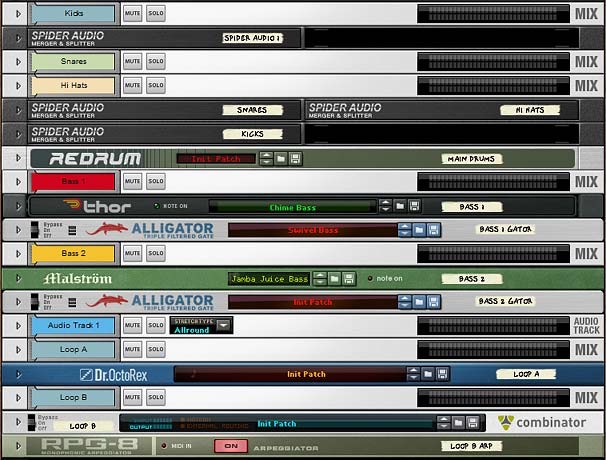
Now create 2 additional mix channels and put them under the first mix channel for the Redrum. Label each Mix Channel Kick, Snare and Hi Hat. Create 3 Spider merger/splitters and use them to merge the sounds from each single channel through them and back into their respective mix channels. This way you end up with 3 channels for the 3 different drums. You’ll see why we do this in a minute.
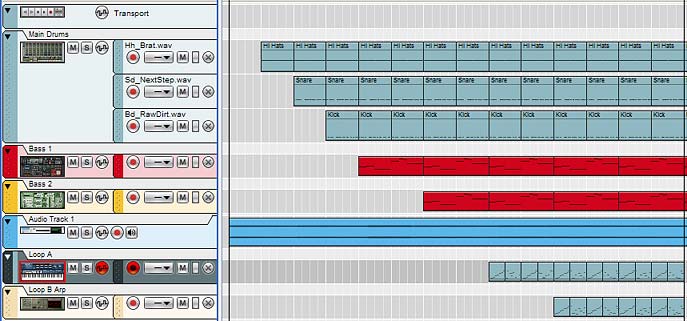
And now copy the Redrum pattern to the track. Go to the track and using the Tools window (F8), go to the “Explode” function and explode the drum clip to their own lanes (you may want to delete the old lane and label the 3 different clips so that you know what’s what. I’ve done this enough times to know that the order is the Hi Hats at the top, the Snare Drum in the middle, and the Kick drum on the bottom. Easy enough.
So why separate mix channels? The reason is because you want to be able to process each drum differently. And this ensures that we can do this with a minimum of fuss. So first off, select the Kick mix channel, right click, and go to Effects > Pulveriser. The device is automatically routed inside the Mix Channel’s “Insert FX” section — if you’re new to Reason 6, this might be confusing at first. But think of each Mix Channel as having its own built-in Combinator where you can place effects and even route / program them as you would a normal Combinator. It keeps your rack clean and makes working with effects easier. Trust me on this.
With the Pulveriser, I’m going to set up a nice beefy Kick — watch the video for how this is done. After that, I’m going to have a little bit of fun by varying the pitch somewhat on 2 out of 3 of the kicks. Flip to the back and you’ll see that the Pulveriser can not only be used to beef up the kicks, but we can steal some of it’s modulation to affect the pitch on those kicks as well. So use the Tremor / Follower outputs and send them into the Pitch inputs of 2 kick drum channels on the Redrum. It’s a nice idea also because it doesn’t require any extra devices to set up.
Now I’m not going to go into processing for the snares and kicks, but I think you get the idea now. Don’t be afraid to add a few effects, and when done, you can also add an EQ to each drum individually to cut the low end and boost certain frequencies a bit. That’s one method to work with the drums. Now on to the Bass.
Working the Bass into the Mix
Now we move on to the bass. Again, this is just one of the methods I used to come up with this song challenge. It’s nothing fancy. Start out by adding a Bass instrument and ensure you have a bass that you like. Something with a long sustain so our notes can ring through. Don’t worry if the notes sound too long. We’ll adjust their note lengths in a minute. For now, just find a bass sound in the FSB that works with the drums and that gives you some degree of pleasure when you hear it.
Now go to the sequencer and draw in a 4-8 bar bassline. Again, don’t get too caught up in the composition. You can always change it later. Just something simple. This will be the driving sound for the song, for the most part. At least that’s what it is for me.
Now Loop the clip. This is so that you can audition the effect we’re going to add. And also so that we can switch out the bass with another bass instrument if we don’t like it. I do both of these things. I also add another one or two basses and copy the clip to those other instruments. This way we have a nice thick layered bass; just as the drums are layered.
For the effect, my go-to device is an Alligator. This is because it really is a nice way to add some movement and also since I’ve created a bazillion Alligator patches, I can audition them as they play through. Once I find one I like, I keep it. And since I usually have at least 2 bass instruments, I have the lower bass line kept as the sub bass without any effects, and the higher basses utilize the Alligator. In this way, you end up with a nice lush line playing through your song.
Another Fun Audio/Alligator Trick: Introducing some Pad-like Elements.
Here’s something fun that I’ve been toying with in most of these songs. It involves adding one or two audio channels, and then dropping a short melodic sample into the audio track. Then I’ll take the sample and stretch it the entire length of the song (or beyond, depending how the waveform looks). The idea is to have the audio act as a Pad sound for the entire length of the song. And since you’re stretching it out beyond recognition, you end up with a real twist on the sample.
Once you do this, make sure to lower the level significantly. The idea is to have the sound running in the background so it’s audible, but doesn’t take over the drums or bass. A nice subtle sound.
To complete the trick, I add an Alligator to the audio channel. It’s important to remember that the Effects work on audio just as they would on MIDI clips. So adding an Alligator provides some nice movement to your pad sounds. I wouldn’t go crazy with the Alligator in this situation. Just a slight movement to the sound is all you need. So again, audition some of the Alligator patches in the FSB, or get my Pureffects Refill for a selection of 200+ Alligators. 🙂
Finally: Some Dr. OctoRex accents to really Kick it up a Notch
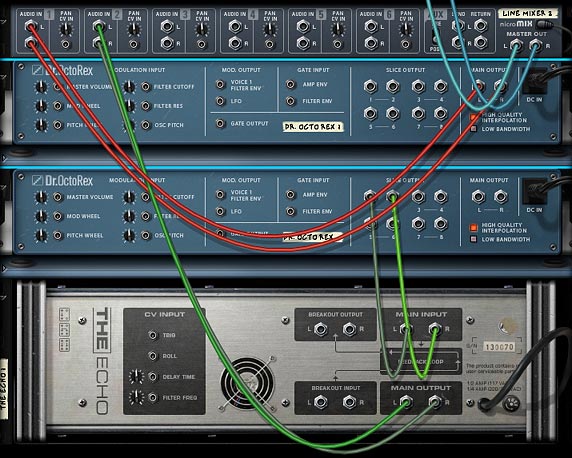
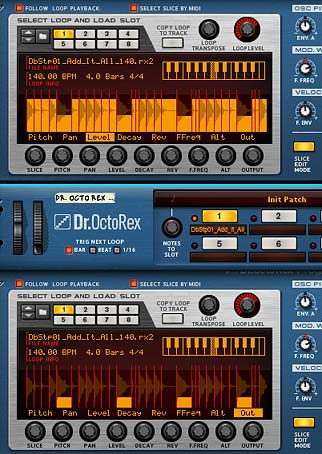
Lastly, let’s add some accents using a loop. You’d think a single loop can’t do much, but wait until you see this fun little trick. It’s not so much a mystery, but while the song is playing, create a Dr. OctoRex and find a loop that goes along with the song. In this experiment I wanted to find something with a hard edge, so I opened up the “Hardcore” folder in the FSB and found a loop that I thought had some possibilities. I then set about filtering it and adjusting the Octave setting, and adding the LFO for some modulation. Once this is done, copy the loop to a portion of the track (4-8 bars long) and then turn off the “Enable loop playback” button, so you don’t get double-note sounds.
Now in the sequencer you can go about altering the notes and creating some variation.
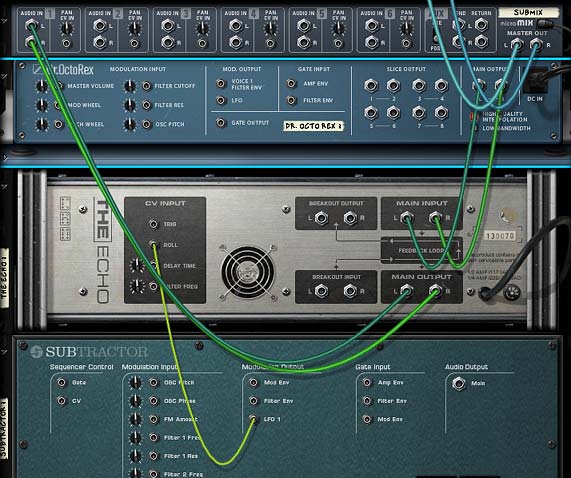
Finally, copy the Dr. OctoRex and Track. Using this copy, make some adjustments. Then combine the Dr. OctoRex and create an RPG-8 Arpeggiator to play the Combinator. Go to the sequencer and move the notes from the second Dr. OctoRex down to the Arpeggiator track. Then go back to the rack and copy the loop into all 8 slots. This is so that if the notes on the sequencer playing the RPG-8 switch the loop slot, the same loop is still playing.
From there, you can go to town switching things around in your loop. Usually changing the octave, updating some settings on the RPG-8, etc. will produce some interesting results. The nice thing is that both loops have the same groove and timing, so they will sound like they belong together. Indeed, this is where I had the most fun: playing around with settings until you find the right balance between the loops.
Don’t forget you can also edit the slices directly, or use some CV to modulate things further. Experiment and play until you make the loop your own. That’s really the key here.
So there you have it. One method I used to create seven songs in seven days. Now go out there and challenge yourself to create your own group of songs using your own methods, or incorporating some of the methods I outlined here. The sky is the limit. So reach for the sky!

